Contact Us

Use the form on the right to contact us.

You can edit the text in this area, and change where the contact form on the right submits to, by entering edit mode using the modes on the bottom right. 


123 Street Avenue, City Town, 99999

(123) 555-6789

email@address.com


You can set your address, phone number, email and site description in the settings tab.
Link to read me page with more information.

Carrie Havranek

writer-editor-cook-baker

Filtering by Category: Recipes

The Greenest Goddess Dressing

carrie

green goddess dressing

It's spring. Things are greening, finally. Greens galore are here at farmers' markets in Pennsylvania. We'll have to wait for the rest (radishes, herbs, beets, carrots and potatoes, etc.) until it warms up a bit. But for now, we have our pick of greens. A couple of weeks ago, tired of the usual variations on oil and vinegar, I hacked a green goddess dressing. I received some "recipe please!!" comments after posting a pic on Instagram where it was adorning some quasi-grilled romaine (another story altogether; the gas ran out mid-char). I figured I'd return to this project.

Green goddess goes all the way back to the 1920s and had a good run in the 1970s-80s, but is experiencing something of a resurgence right now—with some twists, of course. You typically see it with cobb salads and others with sturdy greens that can withstand a substantive dressing and whose leaves provide all sorts of crevices and crannies for the dressing to get lost in. It would also work well as a veggie or pita chip dip, or as the binding agent for some manner of tuna or chicken salad, should you wanna roll that way, too.

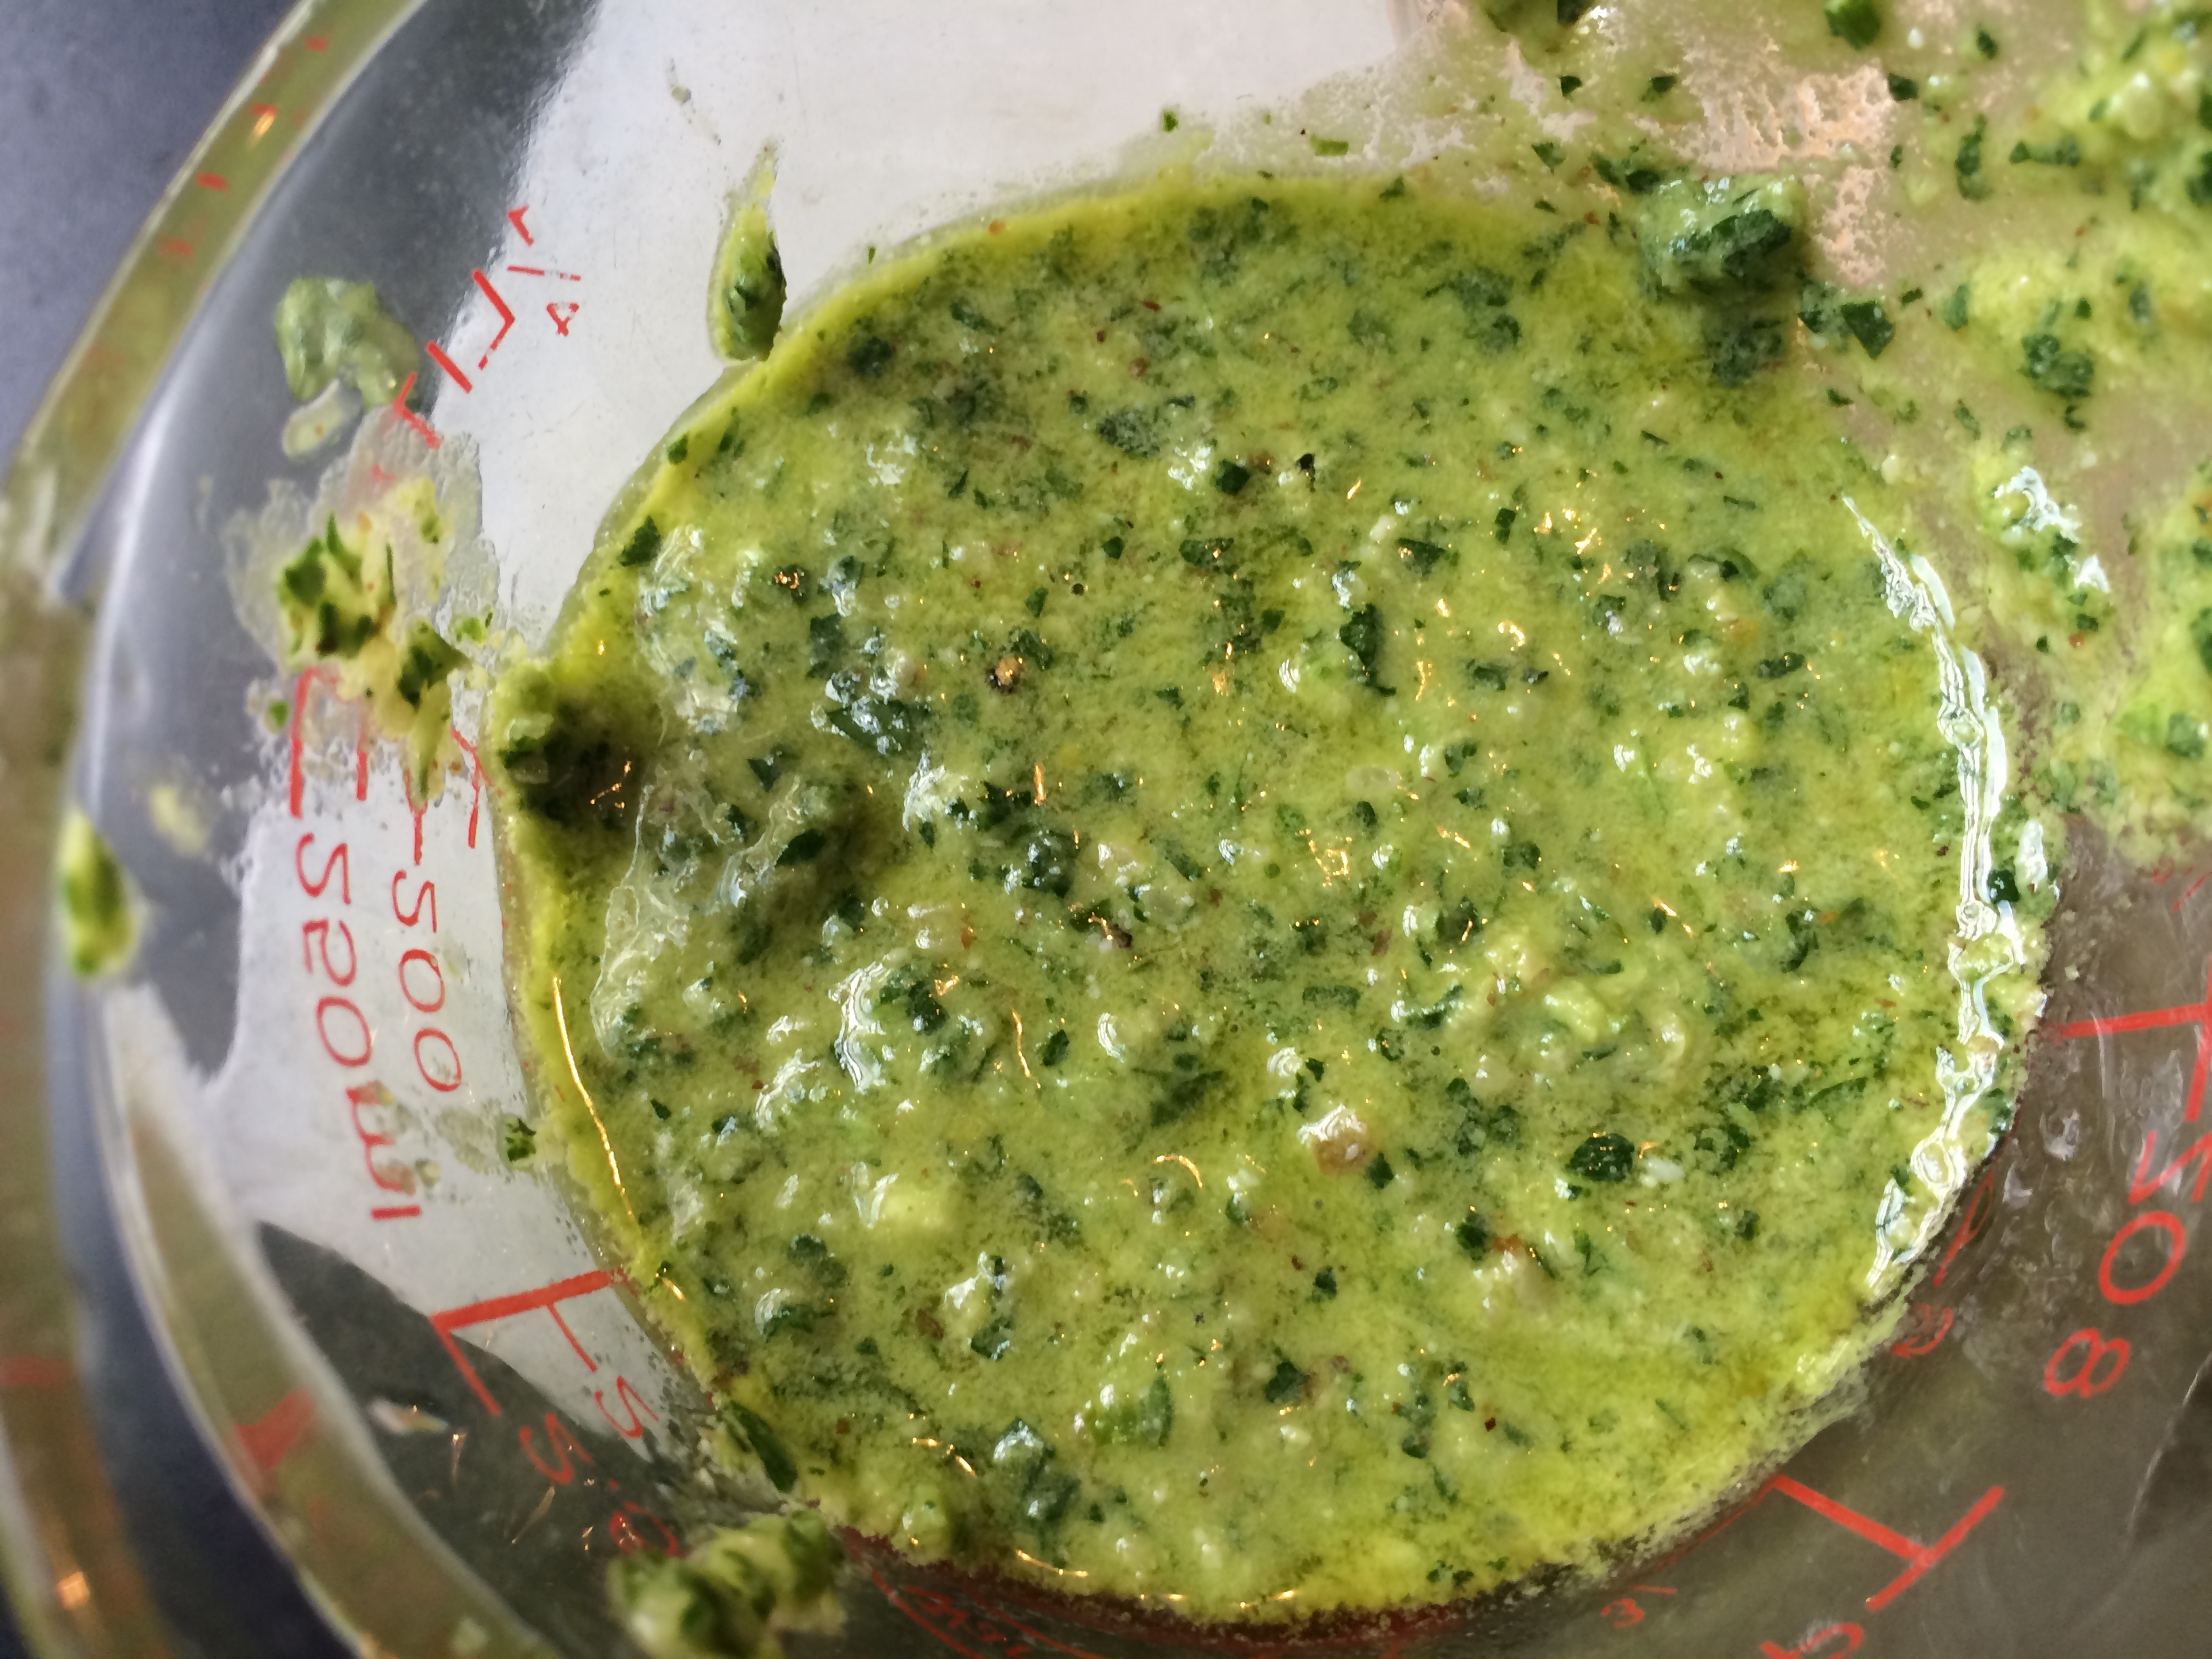
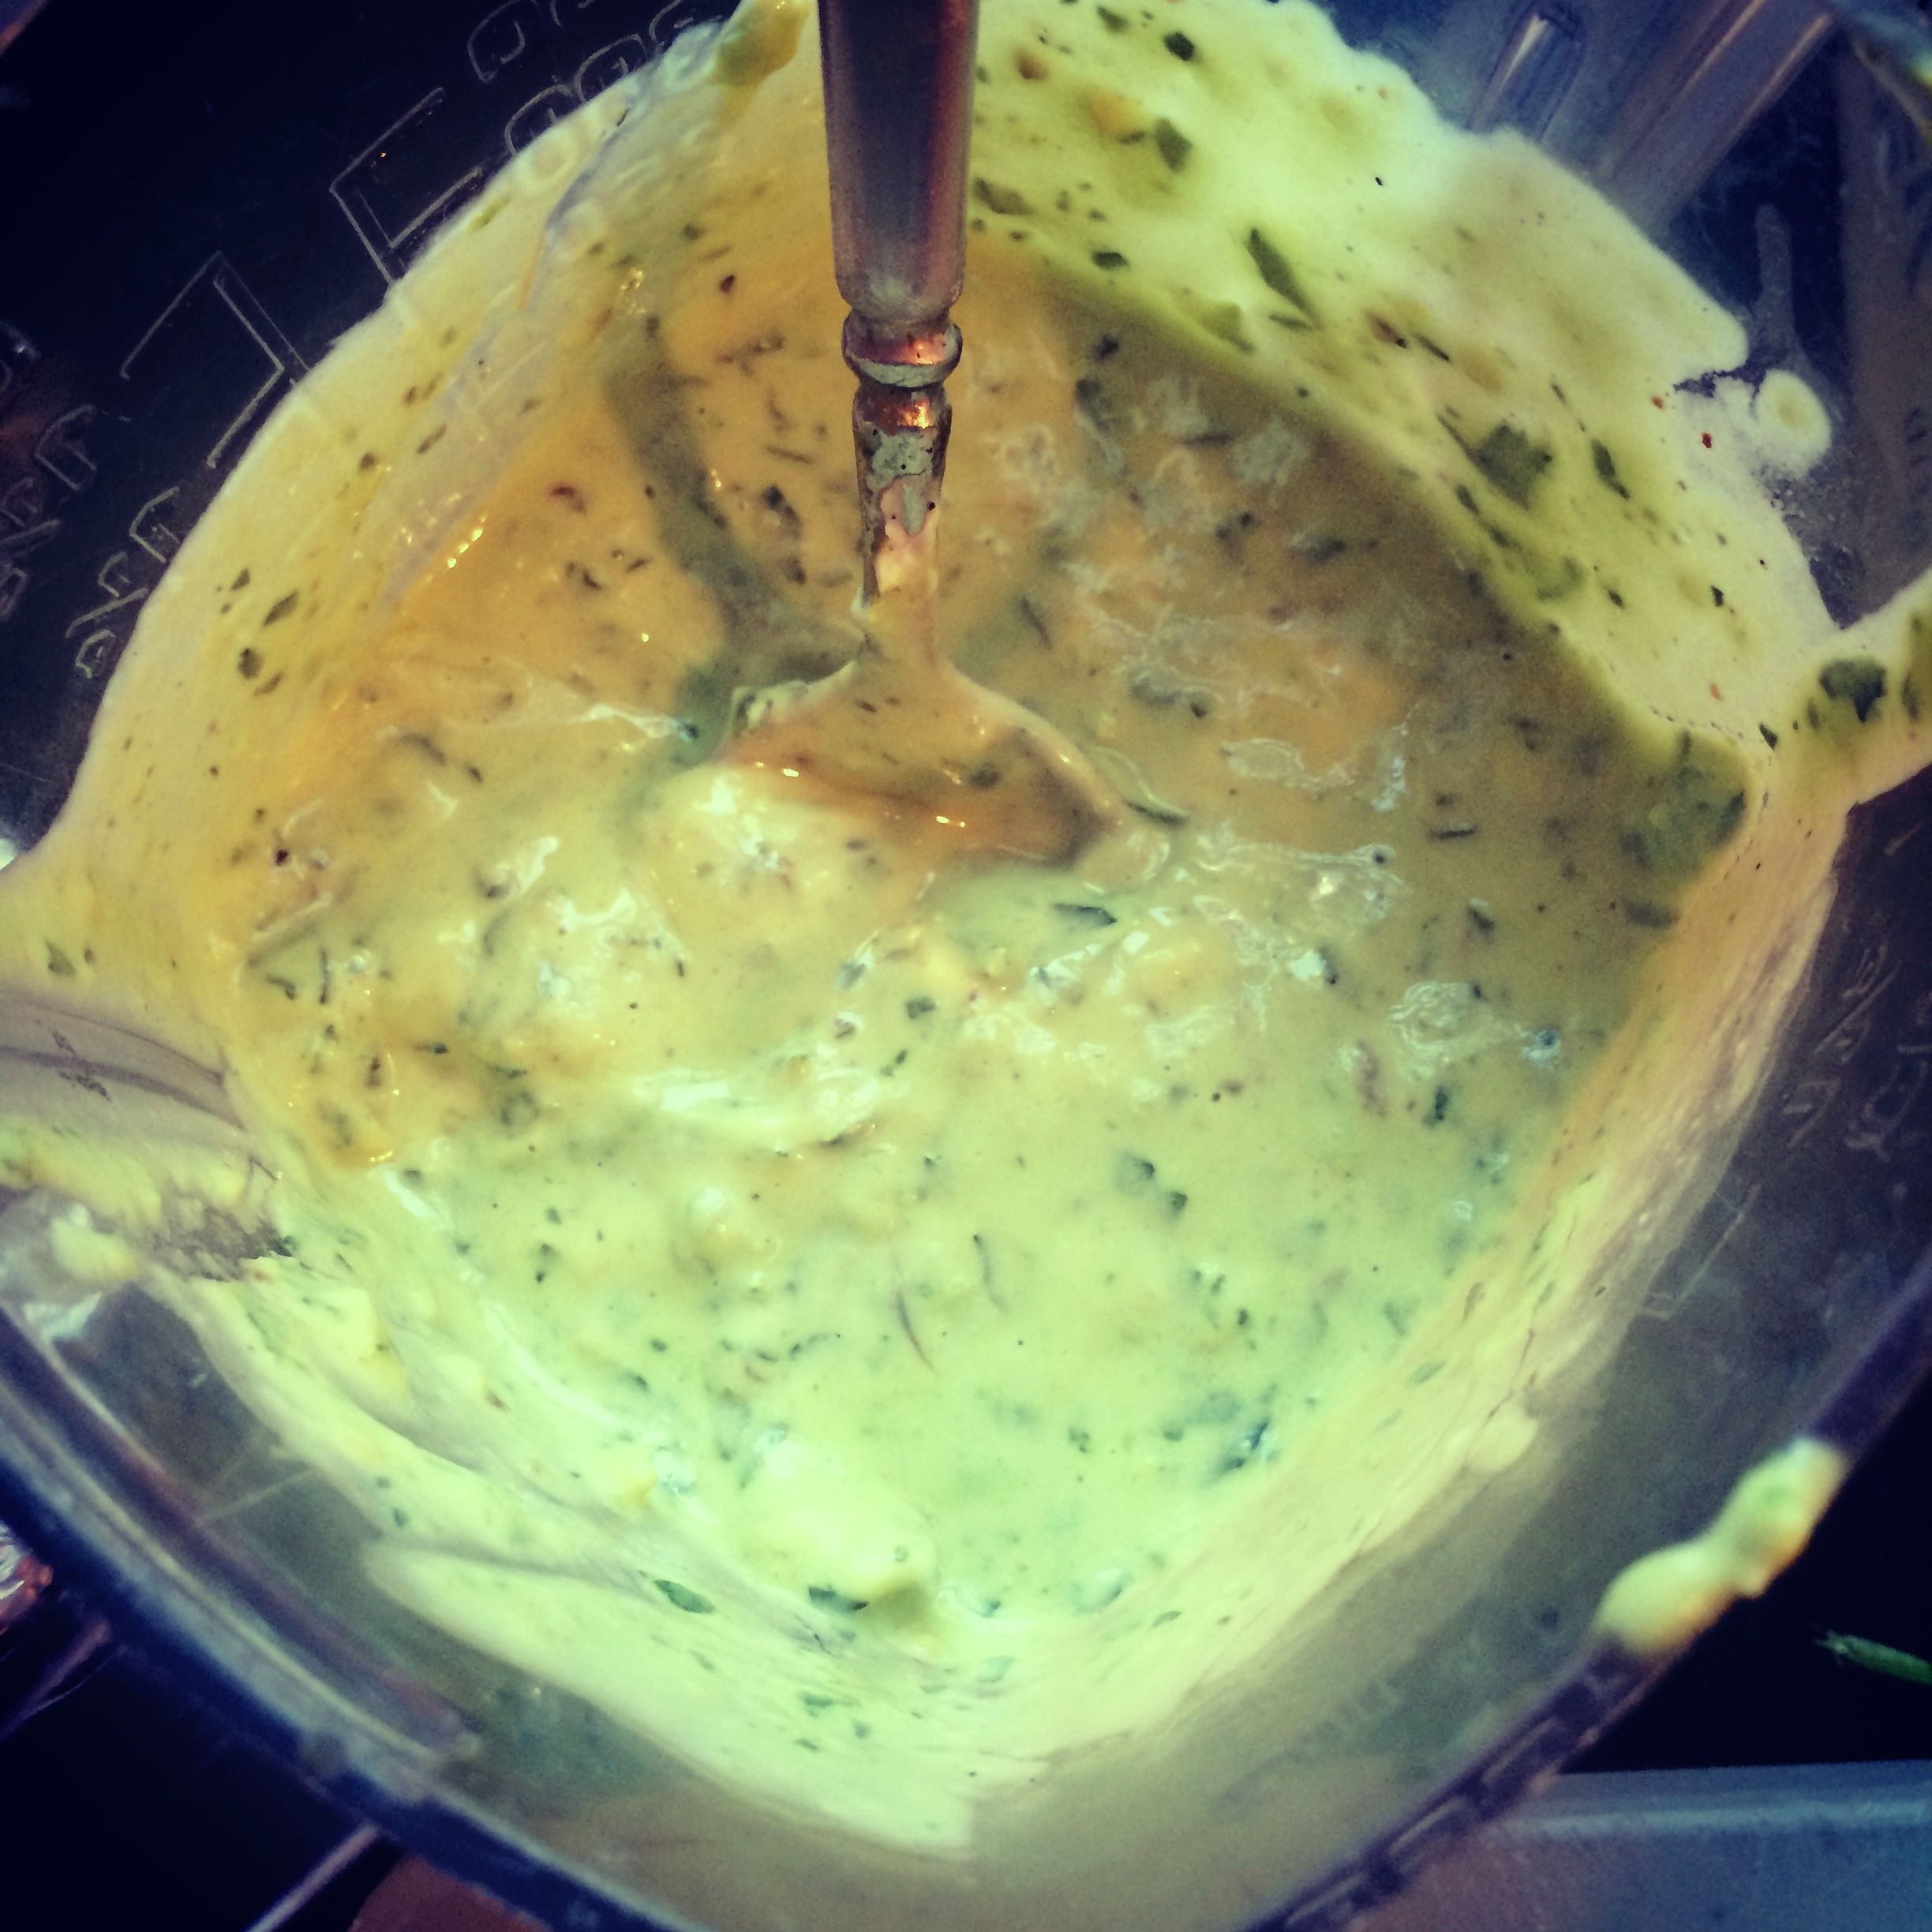
The modern versions, like this one, often include heart-healthy avocado; classic elements typically feature anchovies, fresh spring herbs, mayo, sour cream, and lemon juice. (I think I even recently saw a twist on this with pureed green peas.) They don't typically include water or olive oil, but I found I needed both. By design, this recipe includes the minimum amount of mayo required before it got too gloppy and mayo-ey (plus olive oil lends some fresh zip and helps with emulsifying). And I had an avocado just this side of perfectly ripe and smushy, so the little bit of water helped break things down. As you can see, I didn't make it completely smooth, mostly because I was scrambling to get dinner on the table to several hungry and really tired campers. Sometimes aesthetics go out the window. If I had had more time, I would have snipped off some chives from the yard or the tops of green onions for a little more bite. In fact, why don't you go do that and please, let me know what you think?

Ingredients

  • 1/2 of an avocado
  • Zest and juice of one lemon
  • 1-2 garlic cloves
  • 1/3 cup plain Greek yogurt (or sour cream)
  • 1/4 cup organic mayo (homemade or otherwise)
  • 1/4 cup water
  • 1 large handful parsley (about a 1 cup, stems included)
  • Several pinches of kosher salt and freshly ground black pepper

Directions:

1. Put all ingredients into a food processor or blender, and let 'er rip. You should get about 3/4 cup of dressing, which you can keep stored in the fridge in a sealed container and it should be good for about a week.

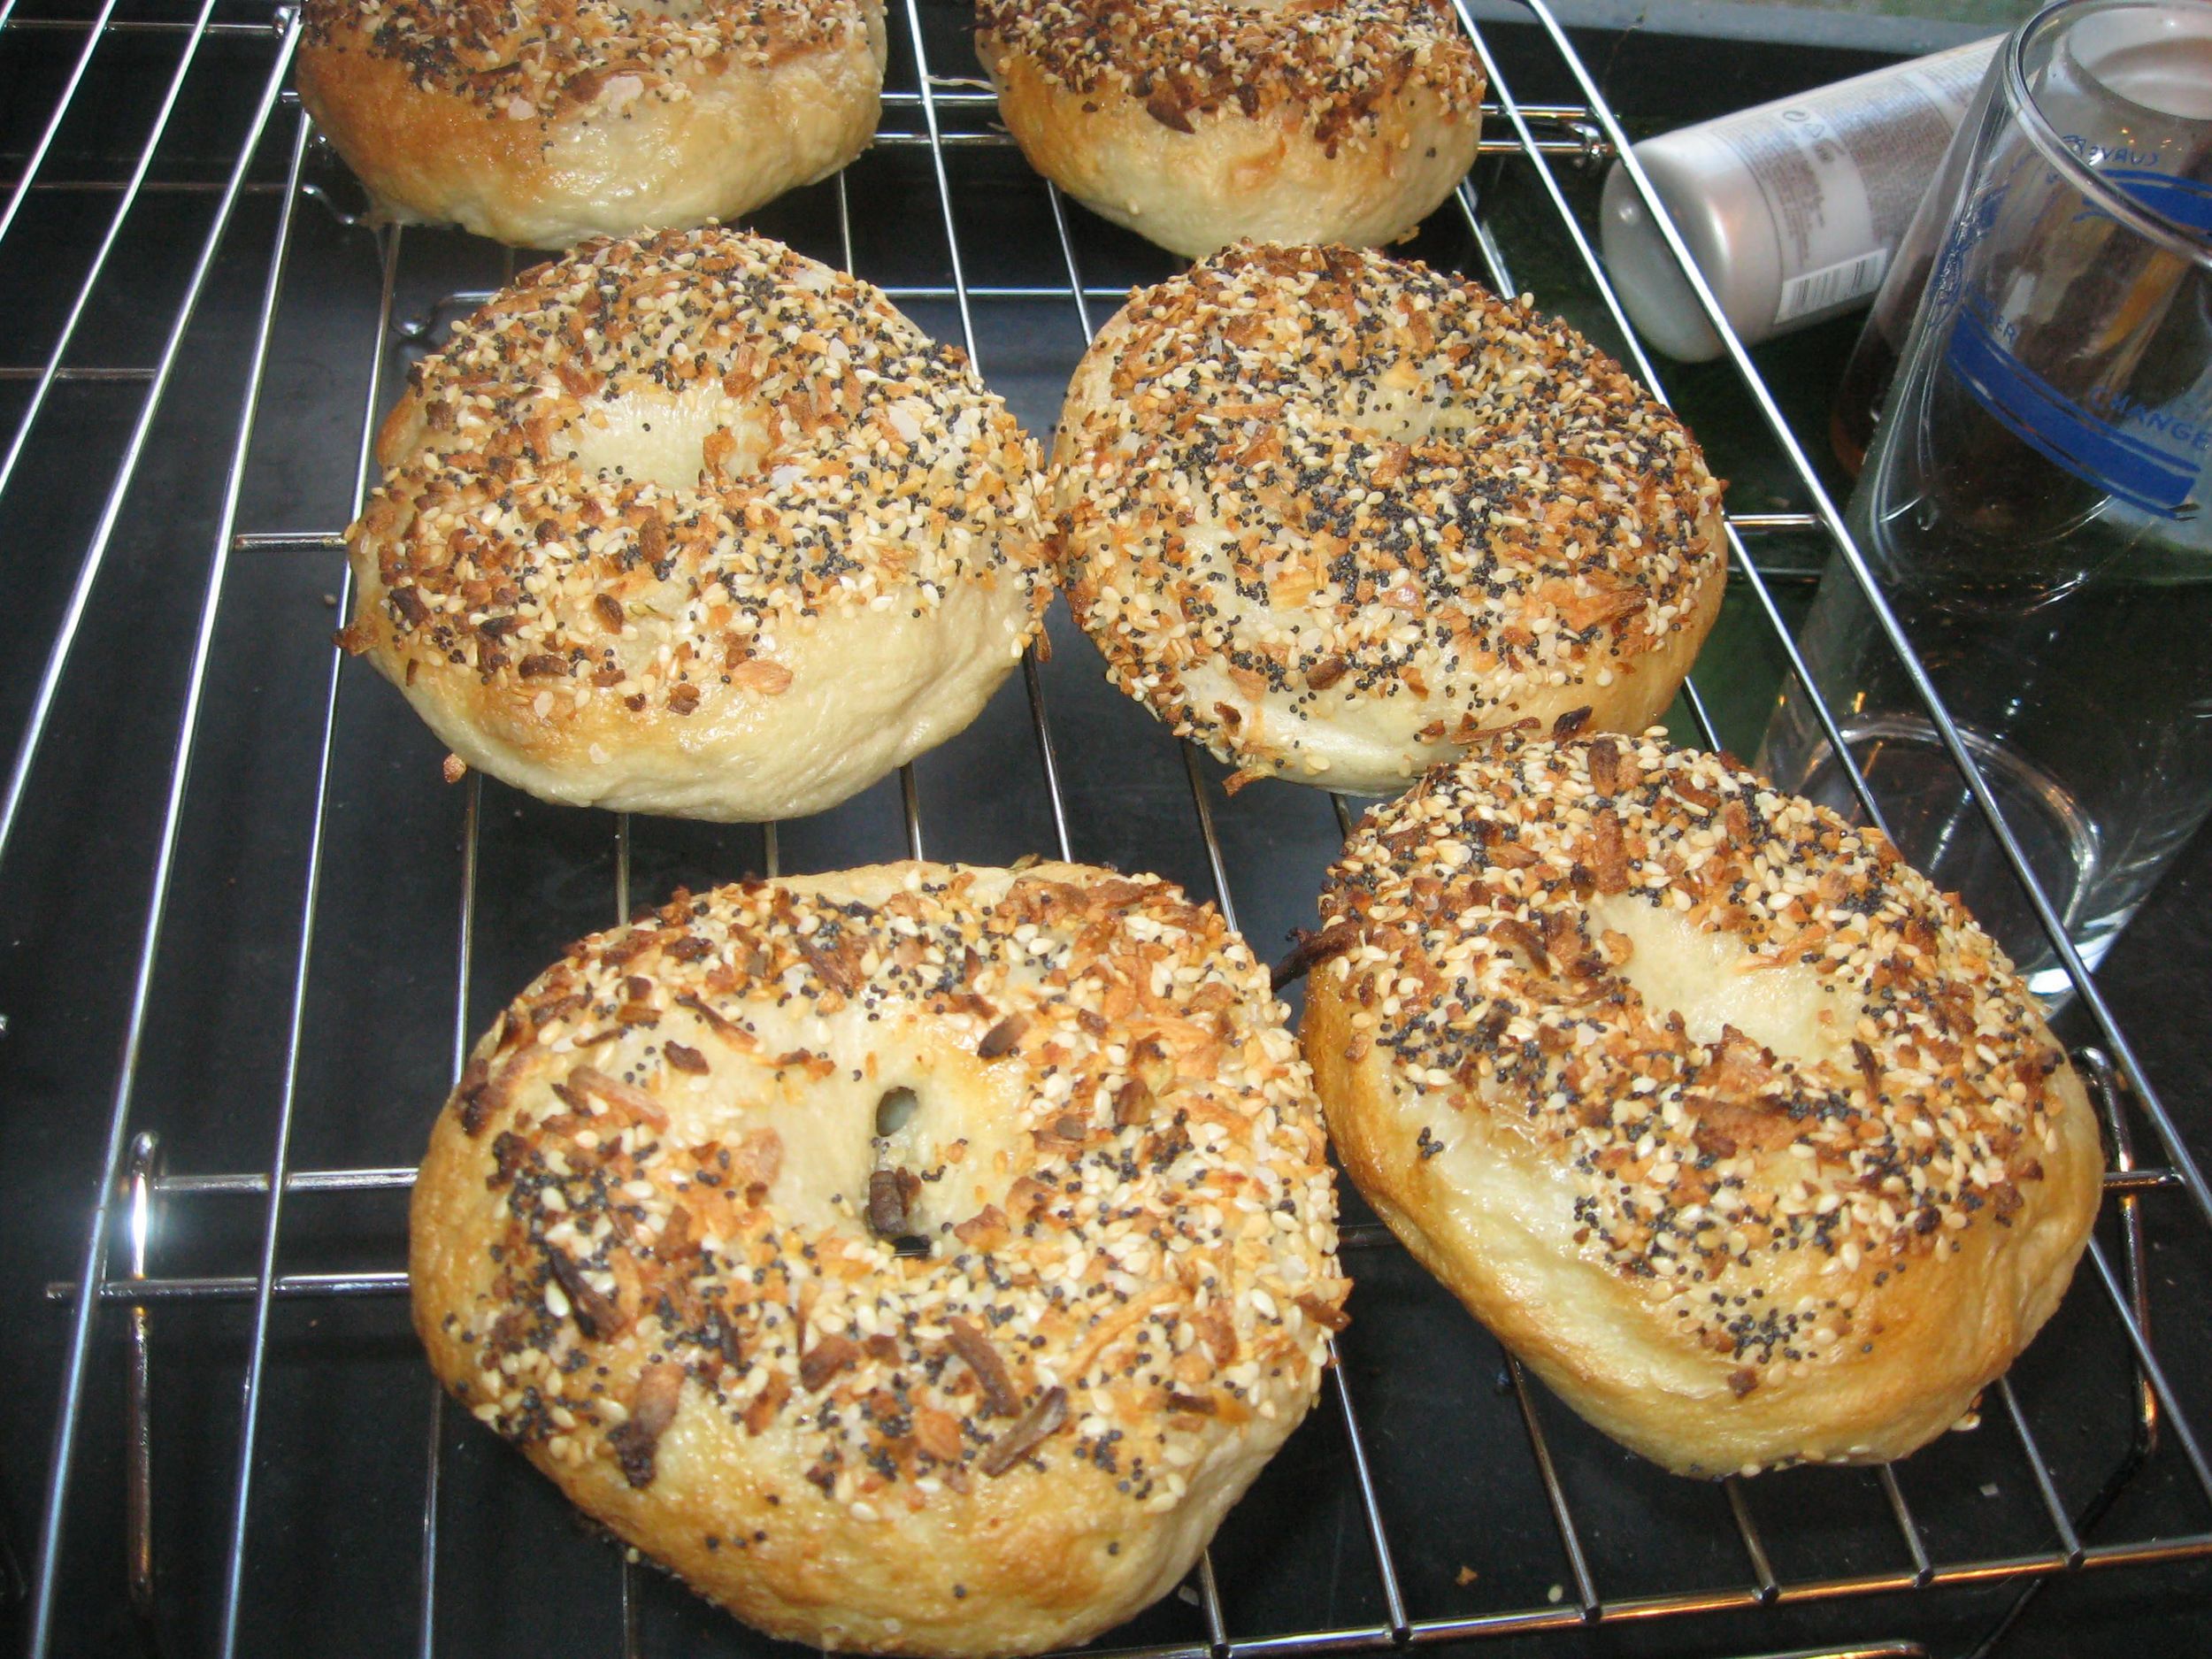
Sunday involved yoga, a great big brunch at a friend's house with park time, and an afternoon surprise event involving a swarm of bees in the yard that required emergency rescue and relocation. All of a sudden, it was 6 o'clock and there was no acceptable dinner plan. So, last night's dinner wound up being two take-out pizzas from Sette Luna with a salad I threw together of fresh local spinach from Jett's Produce and not quite baby lacinato kale. The farmer I bought it from, Tom Murtha of Blooming Glen, called it "teenager kale" because it was not the full, frondy lacinato kale we know, nor was it baby kale, whose smaller leaves are sweet and typically tricky to find. They both served as willing recipients of the 2-3 tablespoons of dressing I used here.

spinach kale salad.jpb

Presto! It's Pesto!

carrie

parsleypestopyrex
parsleypestopyrex

I know I'm a bit premature with my proclamation that we're getting close to pesto season, but we'll be greeted by market fresh herbs and greens such as ramps, sorrel and garlic scapes before you know it. Pesto, once you've got the hang of it, is endlessly adaptable: It's just waiting to be tossed with some pasta water with the shape of your choice, spread on a sandwich or around the base of a pizza, or used as a rustic crudite dip. (Ian, this one's for you—it's easily veganized, and I know you have a food processor.)

First things first: Pesto means sauce. It does not always necessarily by definition mean you have to use basil. Okay? Ok. You can even make pesto out of broccoli stalks (what my sister and I used to call tree trunks) and kale ribs (just steam 'em a bit first).

Secondly, I'm putting this forward as something of a loose template, with some caveats. Obviously, if you are on a budget you will look at the price of pine nuts and shudder. If you are following a vegan diet, you'll want to sub some nutritional yeast for the cheese factor; just dial it back a bit in terms of the amount. And if you are allergic to nuts and following a vegan diet? You'll want to use nutritional yeast and sunflower seeds; the latter tend to get nutty when you grind them. Celiac or gluten sensitive? Stay the hell away from nutritional yeast, but you probably already knew that.

parsleypestofoodprocessor

Here's a combo I happen to like: parsley-walnut pesto. I think of it as an all-year round pesto, simply because I can obtain organic parsley easily and it's one of those herbs I buy regularly without fail and all year round, along with cilantro, thyme and rosemary. (I don't buy basil in the winter because then tomatoes and mozzarella should hang out there, too, and I can't eat a Caprese salad in January. I. just. can't.) This couldn't be simpler. If you're making this for dinner or another meal, you can complete these steps while the pasta boils.

Parsley-Walnut Pesto

Ingredients

  • 2 cups fresh parsley, stems included, loosely packed
  • 1-2 cloves garlic
  • 1/4 cup walnuts (you can toast in a dry pan over medium heat till they're fragrant first if you like)
  • 1/4 cup Locatelli Romano cheese
  • Zest and juice of one whole organic lemon
  • 1/3 cup extra virgin olive oil
  • Kosher salt and freshly ground pepper to taste

Directions

1. Place the parsley through lemon zest and juice into the bowl of a food processor, and pulse a few times to combine. Stop the machine, taste the mixture, and add a couple of good pinches of salt and several grinds of black pepper. Switch it back on and, using the funnel, pour the olive oil into the food processor and let it go for about 15-20 seconds. It won't take long to come together.

2. Remove the lid and taste the pesto, adjusting seasonings to ensure a fresh, bright and fairly smooth taste. Yield: About 6 ounces or about 2/3 cup.

3. Let's assume your pasta is ready. Remove it from the boiling water with a spider strainer into a large serving bowl. Scoop your 1-cup glass measuring cup into the pot to get about 1/2 cup of hot pasta water. Dump the remaining water out into the sink, return the pasta to the hot pot, add as much pesto as you like (I used about 3 ounces of pesto for 8 ounces of uncooked pasta), and stir to combine. Slowly add the reserved hot pasta water, and stir it all together fairly vigorously. Transfer to your serving bowl and hit it with some grated cheese (please, not the kind in the green can.)

A few words about the pasta. For pesto, I like to use a shape with lots of nooks and crannies, like the gluten-free "garden pagoda" veggie pasta you see here, but anything will work, really. In the last 2 minutes of cooking I added 1/2 cup frozen peas to the pasta water, and then once everything was in the hot pan with the pesto, I added about 8 ounces of thinly sliced organic chicken breast I'd cooked a day or so before.

A few words about pesto. Sometimes I see recipes that include some part water (in place of the full amount of olive oil), with the aim of calorie reduction. If you have to do this, please be prepared for a flat experience and a watery pesto; the extra virgin olive oil makes all the difference and lends a fruity, herbal taste (depending somewhat of course on the oil you use.) You can certainly add more olive oil if you like—it's your call. And parents, if you're reading, pesto-based dishes are a really sneaky way to get vitamins, minerals and healthy fats into your children's diet and will typically contain far less sodium than jarred, store-bought tomato sauce. If you've made baby food before, you know that pureed veggies and herbs, if prepared well, typically go down easily with kids.

parsleypestocloseup
parsleypestocloseup

New York Crumb Cake

carrie

If you've grown up in the New York metro area (or, in my case, in South Jersey with parents and relatives from said region), you know a few things. You likely know what makes a good pizza: it's foldable, not too greasy and should hold up horizontally with the support of a thin crust. You probably know from bagels (they are not glorified rolls with holes), and what constitutes a killer piece of crumb cake. I don't know what "coffee cake" is. People often use these terms interchangeably, but no coffee cake recipe ever has crumbs like small boulders, and that's what you want. I came across a recipe for this so long ago, I can't remember where I got it, but I've changed it so many times, it's pretty much mine now. So you may not have a brunch coming up like we just did yesterday, for Easter, but whatever. You can make this whenever you like, but don't say I didn't warn you. You really do need a crowd so there are no leftovers.

New York Crumb Cake

Cake Ingredients

  • 1 1/2 cups plus 2 T. all-purpose flour
  • 1/2 cup sugar
  • 1 T. baking powder
  • 1/2 tsp. salt
  • 1 large egg
  • 1/2 cup plus 2 T milk
  • 3 T. canola oil
  • 1 T. vanilla extract

Crumb ingredients

  • 2 1/2 c. flour
  • 1 cup plus 2 T. light brown sugar
  • 1 T . ground cinnamon
  • 1 cup butter, melted and cooled

Instructions

1. Preheat the oven to 325 degrees Fahrenheit and butter and flour a 9x12 pan (or douse it with nonstick spray), tapping the pan over the sink to remove excess flour if needed.

2. In a medium bowl, sift together the flour through salt and set aside.

3. In a second, larger bowl (I like to use my 8-cup Pyrex measuring cup for this), whisk together egg, milk, oil, and vanilla. With a spatula, gently fold the dry ingredients into the wet ones.

4. Spread the batter evenly into the prepared pan, using an offset spatula that you've greased or fingertips that you've also greased. The batter will be sticky and you'll think there's not enough there, but trust me, it will fit.

5. In a third, medium bowl combine the flour, sugar and cinnamon with a wire whisk, or work your fingers through it to break up any sugary clumps. Pour the butter over it, and combine with a spatula. Get your hands in there to form large crumbs and incorporate all that butter and flour and sugar. Take said clumps and distribute them evenly over the cake. You'll have a lot, and you'll be happy you do.

6. Bake for about 10 minutes, rotate the pan, and then bake for another 10-12 minutes or until a cake tester comes out clean. Remove from the oven and let it cool completely on a wire rack. Dust the whole thing with a generous shower of confectioner's sugar. Cut it into whatever sized squares you want.

NYCrumbCake
NYCrumbCake

Middle Eastern Buddha Bowl with Honey-Lime Tahini Dressing

carrie

Yeah, that sounds a little ethnographically confusing, doesn't it? For one, what's a Buddha bowl? Recipes for Buddha bowls are easy to find online, and in fact, you can do one without a real recipe—except for maybe the dressing. Basically, the modus operandi here is to combine healthy, nourishing foods in a bowl and unite them with a dressing that almost always contains tahini, as Buddha bowls are usually a vegan thing and tahini packs a protein-laced punch.

Some people take an anything goes approach, clearing out what they've got lying around and throwing it together, which makes the Buddha bowl a good candidate for end-of-the-week farmers' market remnants, grain or protein leftovers and seeds in the pantry. However, I don't believe the kitchen-sink approach always yields the best taste. Let's be honest here, people: Some veggies just don't necessarily belong together. Gasp! I've decided to treat this more like a composed dish, inspired by the flavors of the Middle East/Mediterranean.

Middle Eastern Buddha Bowl with Honey-Lime Tahini Dressing

Middle Eastern Buddha Bowl with Honey-Lime Tahini Dressing

If you like, swap out the beans for tofu, or switch out the greens for what you have on hand, or change the flavor profile altogether with different herbs and spices. I've made it with lemon juice and it's just as lovely. In fact, I plan on making this a bunch of different ways as the growing seasons progresses, but this is one of those endlessly variable dishes that pack well (just store the dressing in a separate container) and easily, happily feeds a crowd—even one with children in it. This one more than amply fed three adults and three kids, ranging from 5-6 in age.

Middle Eastern Buddha Bowl

Serves 4-6

Bowl Ingredients:

  • 1 head of cauliflower, cut into small florets
  • 1-2 T of extra virgin olive oil
  • 1 tsp. garam masala
  • 1 bunch of kale, washed, ribs removed and leaves chopped
  • 2 cups chickpeas, rinsed and drained if using canned
  • 2 cups cooked millet
  • 1 pint of grape tomatoes, cut into thirds vertically
  • 1 cup of pumpkin seeds
  • 1 cup of Italian leaf parsley, chopped
  • Salt and pepper, to taste

Dressing Ingredients:

  • 1/4 cup extra virgin olive oil
  • 1/4 cup lime juice
  • 3 T. tahini
  • 1/4 cup honey
  • 1-2 garlic cloves
  • Salt and pepper to taste

Instructions for the Bowl:

Preheat the oven to 400° Fahrenheit. Toss together the cauliflower, olive oil and garam masala, and season with salt and pepper. Spread it out on a rimmed baking sheet and roast for 20-25 minutes until the tops start to brown and the cauliflower starts to soften a little. Remove from the oven and set aside to cool. (This can be done ahead of time; Buddha bowls take kindly to room temperature serving.)

Find a large, preferably wide-bottomed bowl, and fill it with the kale as the base. Starting clockwise from the top, add the chickpeas, tomatoes, parsley, pumpkin seeds, and millet in any order of your choice.

Toss with the dressing, which you've assembled per below.....

Instructions for the dressing:

Combine olive oil through garlic in a food processor and blitz till smooth. Add salt and pepper, pulse, and taste. Adjust ingredients according to your liking.

The 10-Minute Vegan Chocolate Cake

carrie

Going to someone's house for quick weekday dinner, especially for the first time, means you don't show up empty-handed. At least I don't. I have determined that I have a compulsion, nay, a pathology about this. If I am going to someone's house, chance are I'm packing something edible or potable. It just doesn't feel right to arrive without a consumable offering. Yesterday, I threw together this vegan chocolate cake, which is so absurdly easy, there's no reason why dessert should be relegated to a weekend domestic project. A 10-Minute Vegan Chocolate Cake may fit the bill; the 10 minutes refer to assembly time, not baking time—which is hands off, anyway.

A note about substitutions: if you don't have coffee extract or espresso powder, swap it for 1 T of coffee, and add it to the liquid. If you have neither, no worries. Coffee related additions create depth in chocolate desserts and I almost always, with very few exceptions, bring it on. And because I've adapted this from the awesome book Vegan Cupcakes Take Over the World by Isa Chandra Moskowitz and Terry Hope Romero, you can of course make these as cupcakes. Just reduce the baking time to 15-18 minutes.

10 Minute Vegan Chocolate Cake

  • 1 cup almond, soy, or other nondairy milk
  • 1 tsp. apple cider vinegar
  • 1 C plus 2 T all-purpose flour
  • 1/4 cup Dutch process cocoa
  • 1 tsp. espresso powder (I like this one from King Arthur Flour)
  • 3/4 tsp. baking soda
  • 1/2 tsp. baking powder
  • 1/2 tsp. salt
  • 1 tsp. coffee extract
  • 1 tsp. vanilla extract
  • 1/2 cup granulated sugar
  • 1/4 cup brown sugar (of your choice; I used light)
  • 1/3 cup oil of choice (I used coconut)

Instructions

 Preheat the oven to 350 degrees Fahrenheit.

Combine the milk and apple cider vinegar in a measuring cup, stir, and set aside.

Sift together all of the dry ingredients (flour through salt) in a medium bowl.

Add the extracts to the measuring cup with milk and ACV. In a large mixing bowl, whisk the sugars, milk, and oil. Slowly add in the flour, gently folding it in with a rubber spatula. When it's mostly combined, switch to a small wire whisk to get out any last minute lumps but don't overmix it.

Pour into into a well-greased and floured 8-inch round pan (I used a Springform) and bake for 22-25 minutes until a cake tester or toothpick comes out mostly clean (a couple of small crumbs are fine) and the cake has started to pull away from the sides of the pan. Cool on a wire rack for 15 minutes and then remove the cake from the pan to cool completely.

Vegan chocolate cake with vegan chocolate frosting

Vegan chocolate cake with vegan chocolate frosting

You can serve this as is, with a snowy dusting of confectioner's sugar, or actually make some frosting. Or if it's berry season, quickly chop up some fresh organic strawberries, toss them with a squeeze of lemon juice and a tablespoon or so of granulated sugar, and serve them alongside the cake.

The Virtues of Braised Chicken Thighs: Dinner #2

carrie

pomegranate molasses chickthighs

If you saw my previous post, you know what's going on here. If you just stopped by, hello! Never fear: let me explain.

On Friday, my friend Ian asked me for quick and easy dinner options, some of which may or may not be vegan (his girlfriend is.) I promised him five super easy suggestions, including the incredibly versatile chicken thighs which are typically cheaper and juicier than their white meat counterparts. I'm not even going to call these recipes or write out ingredients, and I'm not going to worry about photos. Passing along simple cooking instruction is so important to me, I don't want to let these things impede the sharing. I'm trying to keep it unfettered, easy to follow. If you do this, you can have a meal for several days. If you are familiar with the flavor profiles of various cuisines, you can embellish and fill in the spices, herbs, condiments and veggies accordingly to suit your tastes.

Start with bone-in, skin-on chicken thighs which you've covered in Kosher salt and freshly cracked pepper in a medium sized pot with a covered lid (such as Dutch oven or even a simple 4-quart stock pot will work). Add them to a pan that's been coated with oil over medium-high heat. You want a serious good sear to take place here. Don't be afraid to let it get nice and hot. You want that skin crispy. This should take 5-10 minutes.

Now it's time to start building your sauce. Remove said chicken from the pot to a warm plate. Add in your chopped up aromatic veggies of choice—mirepoix, or even garlic with peppers, or other suitable combo. Let them soften and become, well, aromatic. Once that happens, add in your flavor base. Think dried spices, herbs, mustard, curry powder or paste and stir together for a minute or two.

Next, deglaze the pan with a little bit of liquid such as any kind of good cooking vinegar (red wine, sherry, apple cider), wine, beer, you get the idea—scraping from the bottom with my husband calls "the burny bits" and I like to call flavor crystals. Regardless of what you call them, these will form the base of your sauce.

Add back in the chicken thighs, and then more liquid such as stock, water, apple cider, beer, coconut milk or some combination thereof. Get creative. (I've seen my friend Stacey do this with a jar of salsa verde and then eaten the results. Good stuff!) Make sure the liquid comes up to about halfway the pot. Bring it all up to a simmer, cover it, and let it go.

When you return, about 20-30 minutes later, you should have super tender meat that's great for a variety of applications and which you should be able to pull off the bone with ease. Serve over pasta, rice, noodles, couscous, bulgur, quinoa, you name it. Toss it with veggies or canned beans (which you can add during the final simmering stage.) Shred it and add to salads or serve as a filling with tacos. Cook up an entire package at a time so that dinner or lunch is never a chore; you simply eat what you can, refrigerate the rest, and have the base for your next meal. Cook once, eat several times, right?

Five Easy Dinners That May or May Not Be Vegan

carrie

I was talking with my barista friend Ian today, who asked me for "five dinner ideas that I can do." To spare him and his digestive system from having to order cardboard with cheese for dinner (a.k.a. Domino's), I've taken our conversation between the espresso machine and bakery case, where I endorsed the merits of braising chicken thighs and the versatility of lentils and he shared his disdain for tofu, to the next level. We all have this problem. And in less than five minutes I learned a lot about him. Well, I mostly received confirmation of things I already knew: he wanted something simple, direct, unfussy, delicious, and easily executable after standing up and interfacing with humans all day. I will add some veganizing tips for those nights when he's cooking for his main squeeze. That being said, I decided I'm not going to write a recipe; I'm just going to write instructions, and I'm going to start with one recipe, today, and post another one Monday. If anyone wants more specifics, ask away. I'm happy to provide. But in the interest of keeping this simple and knowing he can do it, I've taken this fast and dirty approach. I made this the other night—sorry, no photos, this is strictly utilitarian stuff, people—so it was on the brain. Adapted from Cooking Light's black bean and goat cheese quesadillas. I've made this dozens of times, and usually a little differently each time.

Here's the first one. I'll post another one on Monday. Enjoy!

1. Black Beans and Goat Cheese Mexican Tortilla Filler

Take  a can and a half (or two cans, it's your choice) of black beans. Rinse them and set aside. With a tablespoon of your favorite cooking fat or oil, saute a small onion (any kind, including a whole bunch of scallions will do) over medium heat in a 8-10 inch skillet or cast iron pan until they soften. Add your seasonings of choice: chili powder, cumin, coriander, paprika (I like cumin); add the beans, 1/2 cup to 1 cup of salsa of your choice. You may not need salt, between the beans and the salsa, but taste it. Let it simmer. It will come together fast. If it looks like it's getting dry, add some hot water. Finally, crumble a 4-ounce log of goat cheese into the pan and let it melt over medium heat, stirring to combine. Turn off the burner, and add about 1/2 cup to 1 cup of chopped fresh cilantro and stir to incorporate. If you have a lime, it won't hurt to squeeze half of it over the finished product.

You can serve this loose, with more water/salsa in it, as a dip with tortilla chips or the chip of your liking. You can cook off most of the water and it makes a great filling for tortillas. You can land it somewhere between dippy and dry and slide it in between the folds of a tortilla and turn it into a quesadilla. Or just eat it with a spoon. I don't police it; I just share it.

To veganize: take half the mixture and put it in a medium bowl, add half the cilantro, and stir. Add half the package of goat cheese to the black bean mixture left in the pan, and proceed as directed. But you probably figured that out on your own.....

Irish Cooking from Cooking Light's Global Kitchen

carrie

FinalCover
FinalCover

This is what happened when I handed my husband a copy of Dave Joachim's new cookbook, Global Kitchen. I asked him to pick a couple things that looked good to him. One of his selections was Beef and Guinness stew. Is it global? Technically, yes. In my house? No; it's a winter staple. However, this is what happens when you marry an apostrophe. And this is what happens when it's a Sunday in March and you're expecting (but gratefully don't get) more snow. (Side note: The other dish he picked was like a Filipino risotto, and I am angling to make shrimp fried rice. Stay tuned.) It's all good. A quick word about the book itself. It's a compendium of all the world's best and signature dishes and foods, rendered with creative twists and licenses taken, with an eye toward ingredients you can easily purchase at any supermarket. That's how full circle we've come these days. And it's a Cooking Light title, so you know it's going to offer a healthy balance for mind, body and spirit.

Without further ado, I'm reprinting the recipe here with permission, along with something you can make while the stew is, well, stewing: Brown Soda Bread. This dish is hearty, as you would expect, but also has a depth of flavor that the previous stew recipe I made did not.

Beef & Guinness Stew

Ingredients

  • 3 T. canola oil, divided
  • 1/4 cup all-purpose flour
  • 2 pounds boneless chuck roast, trimmed and cut into 1-inch cubes
  • 1 tsp. salt, divided
  • 5 cups chopped onions (from about 3 onions)
  • 1 T. tomato paste
  • 4 cups fat free, lower-sodium beef broth
  • 1 12-ounce bottle of Guinness Stout
  • 1 T. raisins
  • 1 tsp. caraway seeds
  • 1/2 tsp. black pepper
  • 1 1/2 cups (1/2 inch thick) diagonal slices carrot (about 8 ounces)
  • 1 1/2 cups (1/2 inch thick) diagonal slices parsnip (about 8 ounces)
  • 1 cup (1/2 inch) cubed peeled turnip (about 8 ounces)
  • 2 T. finely chopped flat-leaf parsley

Instructions

  1. Heat a Dutch oven over medium-high heat. Add  1 1/2 T. of oil to pan, swirl to coat. Place flour in a shallow dish. Sprinkle beef with 1/2 tsp. salt; dredge beef in flour. Add half of beef to pan; cook 5 minutes, turning to brown on all sides. Remove beef from pan with slotted spoon, and repeat procedure with remaining 1 1/2 T. oil and beef.
  2. Add onion to pan; cook 5 minutes or until tender, stirring occasionally. Stir in tomato paste; cook one minute, stirring frequently. Stir in broth and beer, scraping pan to loosen browned bits. Return meat to pan. Stir in remaining 1/2 tsp. salt, raisins, caraway seeds, and pepper; bring to a boil. Cover, reduce heat and simmer one hour, stirring occasionally. Uncover and bring to a boil. Cook 50 minutes, stirring occasionally. Add carrot, parsnip and turnip. Cover, reduce heat to low, and simmer for 30 minutes, stirring occasionally. Uncover and bring to a boil; cook 10 minutes, or until vegetables are tender. Sprinkle with parsley.

The Numbers: Serves 8; Hands-on time: 33 minutes; Total time: 3 hours, 3 minutes.

Beef & Guinness Stew. Photo by Iain Bagwell

During the hands-off part of the process, get your ingredients ready for Brown Soda Bread; this recipe comes to the book from Margaret M. Johnson, author of Flavors of Ireland.

Brown Soda Bread

  • Cooking spray
  • 11.25 ounces whole wheat flour (about 2 1/2 cups)
  • 2.25 ounces all-purpose flour (about 1/2 cup)
  • 1/2 cup steel cut oats
  • 2 T. brown sugar
  • 1 T. wheat germ
  • 1 tsp. baking soda
  • 1 tsp. baking powder
  • 1/2 tsp. salt
  • 2 cups low-fat buttermilk
  • 1 large egg, lightly beaten

Instructions

  1. Preheat oven to 325 degrees Fahrenheit.
  2. Coat a 9x5 inch loaf pan with cooking spray. Line pan with parchment and coat that with cooking spray.
  3. Weigh or lightly spoon flours into dry measuring cups; level with a knife. Combine flours and next 6 ingredients (through salt). Combine buttermilk and egg; add to flour mixture. Stir until just combined.
  4. Spoon mixture into prepared pan. Bake at 325 for about an hour and 5 minutes or until a wooden pick inserted in center comes out clean. Invert bread onto a wire rack; cool completely. Remove parchment; slice bread into 12 pieces. Serves 12.
Brown soda bread--my photo

Notes about the bread:

  • I did not have buttermilk but made my own easily by adding a tsp. of apple cider vinegar; lemon juice also works well here, too.
  • While I was at it with the wheat germ, I added 2 T. of ground flax just because it is right next to my wheat germ in the refrigerator and it seemed like a good idea.
  • If you have a convection oven like I do, you know to drop the temp by 25 degrees and check it at least 5 minutes before any recipe says so. This one baked in my oven in a little under an hour.

Flourless Triple Nut Butter Cookies

carrie

I have become the kind of person who has three different nut butters in her house at one time. I'm not sure how this happened, but because it did, we now have these cookies. A version of this—called something like flourless peanut butter cookies—has been kicking around the Interwebs for a few years, and I even remember making them when I worked at Sugar, in Phillipsburg, very briefly, years ago. The basic recipe is a cup of peanut butter, a cup of sugar, one egg, and some combination of baking soda, vanilla (optional) and salt. Some also have oats. Some also add chocolate chips. I first made them a week ago with equal parts cashew butter and oats, and although they were delicious, they were too dense and dry, despite the addition of a few splashes of milk at the end. Cashew butter is less oily than almond and peanut butter. I decided to approach them this time with a combination of nut butters, thinking the different textures and moisture levels would work better. And they did.

nut butter before oven

Oh, one caveat to share. It's important to note that I used all natural, organic versions of these butters, which don't contain sugar. If you aren't using the same, you should expect a slightly different texture. You might also consider cutting back on the sugar, unless you want them super sweet. You can negotiate that with your tastebuds. Peanut butter tends to be an all-encompassing taste, taking up your entire mouth when you eat it; I like how the nuances of each nut complement each other here.

Flourless Triple Nut Butter Cookies

Yield: 2 dozen cookies

Ingredients

  • 1/2 cup organic all natural cashew butter
  • 1/4 cup organic all natural peanut butter
  • 1/4 cup organic all natural almond butter
  • 1 large egg
  • 2/3 cup light brown sugar
  • 1/3 cup granulated sugar
  • 1 tsp. baking soda
  • 1/2 tsp salt
  • 1 tsp. vanilla extract
  • 2/3 cup rolled oats

Directions

1. Preheat your oven to 350 degrees Fahrenheit. Line two baking sheets with parchment or use Silpat, or grease them with butter.

2. Combine the egg and the sugars in the stand of a mixing bowl fitted with the paddle attachment. Mix at medium speed just to bring everything together, about a minute.

3. Add the nut butters, and mix again until they're all incorporated. Then add the baking soda, salt, and vanilla, mixing briefly to combine. Add the oats and mix just until they're evenly distributed.

4. Drop by rounded teaspoons onto the prepared baking sheets. Lightly press the back of a fork onto the tops of the cookies, so they look like every peanut butter cookie you ate as a kid. Bake for about 9 minutes, rotating the trays about halfway through. You want them lightly browned around the edges and no darker than that. Remove from the oven and allow them to cool on the sheets for a few minutes, and then transfer to a wire rack to cool completely.

close up nut butter
close up nut butter

I imagine this would double easily, without much trouble, but I have become a fan of recipes that yield 2-3 dozen. It's just enough for a couple nights of dessert for the boys, or for snacking randomly without becoming too much of a sabotage. These come together in a flash, and you certainly don't need to haul out the stand mixer if you don't want to or don't have one; these mix together easily with a wooden spoon.

If you cannot eat gluten, you likely buy oats that are gluten-free. Oats themselves do not contain gluten but they're often subject to cross-contamination dangers in places where gluten is present. Bob's Red Mill makes some.

Veggie Crock Pot Stock

carrie

Say it three times fast: crockpotstock crockpotstock crockpotstock. It's a tongue twister, for sure.

What are you doing with your vegetable food scraps? You know, the stalky parts of broccoli when you want the florets (or, as I used to call them with my sister, the tree tops), the stems of kale or Swiss chard when you are chopping it finely, the peels of your potatoes, the core of the cabbage head? The leafy parts of celery? You may be composting them, or just pitching them, or running them through the disposal. How about giving those castaways new life as part of a very hands-off vegetable stock?

I stopped buying store-bought stock, even the organic stuff, a while ago, in part because of some really common sense thing Michael Ruhlman said about how making soup with water instead of store-bought stock (assuming nothing homemade is handy) means that you are basically creating your own flavorful stock as you go. It made so much sense I felt like a sucker for buying low sodium organic chicken and veggie stock when I didn't have my own on hand. But stock rocks, and the flavor ante is seriously upped by using it. And it's not wasteful. These ingredients give us so much love when we prep them for a meal, why shouldn't we love them back and extend their lives?

Here's what you do. Start a quart-size freezer bag with veggie scraps tonight, as you prepare dinner. Label the bag's content with a Sharpie and masking tape. Mine started off with "mushroom stems" and ended up with much more than that crammed into the bag. When you have reached critical mass—or it seems time to do a freezer clean out, as it was in my house—it's time to make vegetable stock in your slow cooker.

I had two bags' worth of scraps of mushrooms, cabbage, kale, broccoli, and more. I added some amazing Turkish bay leaves I bought from Penzey's, Kosher salt, peppercorns, and a roughly quartered onion, and water. And then I let it do its thing on low for 8 hours, starting at the inopportune dinner hour. Honest to God, the smell woke me up in the middle of the night, and I realized I should turn it off. (Maybe that's weird to be so in tune with one's kitchen. Whatever, I'll take it.)  I shut off the machine and let the earthenware insert sit for a couple hours (I get up early) overnight and then put it away in the morning.

Crock pot, chock full of veggie goodness. 

Crock pot, chock full of veggie goodness. 

Here's the loose recipe, but use whatever you regularly cook with and it'll be good. A vegetable stock comes in all kinds of handy, and if you tend to work with lots of the same vegetables in your cooking, using the stock will naturally complement whatever soup, stew, risotto, etc. that you regularly make. My one word of caution here is that you don't overdo it on mushroom, unless you are after an umami-rich stock, because mushrooms tend to usurp other flavors. They are both singular and dominant.

Ingredients for Homemade Veggie Crock Pot Stock

  • 1-2 Tbsp. olive oil
  • 4-5 cups of frozen veggie scraps
  • 6-8 cups water
  • 2 Tbsp. peppercorns
  • 2-3 good pinches of Kosher salt
  • 2-3 bay leaves
  • 2-3 cloves of garlic
  • 1 medium onion, quartered
  • Other elements such as potatoes peels, a chopped carrot, and celery rib or two can be added; just use what's on hand and don't overthink it

1. Drizzle the oil over the bottom of your slow cooker. Add all the veggies in no particular order, frozen. Add 6-8 cups of water, depending on your cooker's size and heft and cut of your veggies; my cooker can take 6 quarts. Remember, the veggies will give off some water as they slowly heat up.

2. Turn the cooker to the low setting and let it go for 8-10 hours. I suspect you may even be able to let it go for 12. You may find this is a useful weekend activity, if you get up early and will be around for most of the day or back in time to turn it off. Or maybe you have a machine you can program to turn off; I don't. (Mine's pretty utilitarian.) You may also find this a great thing to do right before bed; turn it on and go to sleep and wake up to a nice batch of stock.

3. You'll know it's ready by the way your house smells. Trust me on this. Turn off the pot, and let it sit for a while to cool before straining out the veggies and transferring the liquid gold to several freezer-safe containers.

veggie stock
veggie stock

Note: I used 8 cups of water and it yielded 12 cups of stock, which are now hanging out in my freezer, waiting for their next assignment.

Inadvertent thanks and inspiration go to my friend Stacey Chevalier Kerr, who years ago told me about how she makes chicken stock in her crock pot and Tamar Adler's book An Everlasting Meal, which I'm currently reading. Adler's writing is spare, beautiful and owes a big ole happy debt to M.F.K. Fisher. She doesn't (as of yet!) specifically discuss making crock pot stock, but her mission is to show you how to economize with your ingredients, especially if they are beautiful, fresh, and organic. Seriously. You don't want stock made with potato peels from conventional potatoes. My farmer friend Eric of Blue Blaze told me they use rat poison in conventional farming to keep away those critters.

Speaking of which, I can't imagine how much fun this is going to be in the summer, with the leftovers of summer produce. It'll be a fight between the Vitamix and the crock pot to see who gets the castaways in June.

Skinny Elvis Smoothie

carrie

The best way to start this post is with a simple declarative sentence: I got a Vitamix for Christmas. I was hoping for one, but honestly, I didn't dream past the entry level one, given the expense. Instead, I got a more souped-up one, with programmed settings and a large, square-ish container and its very own setting for cleaning. Yeah. Nuts. John tends to go overboard at Christmas, in a big way. It's kind of his thing.

I didn't open it until later in the day on Christmas, because I was in disbelief and felt like it was too much. And even though I'd seen countless demonstrations at Wegmans and elsewhere, I was admittedly a little intimidated.  I eventually got over it. It comes with a demo DVD that Michael Voltaggio rather flatly narrates. (Bonus: it's made in Cleveland. And I love Cleveland.)

So one day at lunchtime, I made this smoothie for my kids. It couldn't be easier. I call it a Skinny Elvis because it's got the King's favorite foods in it, but there's no bacon involved. If you are a member of the school of thought that believes everything is better with bacon, you could add a couple of slices of cooked bacon. If you're feeling crazy bacon love, the rendered fat, too.

skinny elvis smoothie

And yeah, I know I'm late for his birthday, but better late than never. I actually made this last week, but I digress....

Ingredients

1 container Organic Stonyfield Chocolate Underground yogurt

1 banana

2-3 Tbsp. peanut butter

2-3 Tbsp. honey (you may omit this if you are using regular peanut butter; I added it because I was using peanut butter we'd made strictly from peanuts, right in the Vitamix.)

1 cup of ice

If you have a Vitamix you likely know you're supposed to put the softer stuff on the bottom first.

Directions:

Combine all, and blend until you've reached the desired consistency. If the machine gives you a hard time and looks like it's struggling, stop it, and add 1/4 cup to 1/2 cup water. I've found with yogurt-based smoothies, you sometimes need a little bit of water, depending on how hard or soft (i.e. frozen or fresh) your fruits and veggies are.

Yield: 1 large smoothie, perfect for one hungry person to split between two people.  I didn't measure it, but you can see by the photo that it filled two smaller glasses.

I imagine if you don't have the chocolate yogurt, you could approximate this with the same amount (six ounces) of plain or vanilla yogurt, and then add a couple of tablespoons of cocoa powder.

Happy blending!

Snickerdoodle Cupcakes

carrie

snickerdoodle cupcake

It's almost fall, and so that means boots, jeans, and sweatah-weathah. It also means all things cinnamon, apple, pumpkin, nutmeg, clove, cardamom, and chai. It means that soup, stew and homemade bread are also on the way, the latter thanks to a friend who generously gave me some of her sourdough starter (it made it through the power outage, thanks to another friend who kept it refrigerated). It also means you need to make these cupcakes because it's cold and raining this week. It's a pretty straightforward recipe, adapted from Martha Stewart. The original yield called for more than 2 dozen and I only needed 12, so I cut it in half--or thereabouts.

Ingredients:

  • 3/4 cup cake flour
  • 3/4 cup all-purpose flour
  • 1 1/2 tsp. baking powder
  • 1/4 tsp. salt
  • 2 tsp. ground cinnamon (plus more for dusting)
  • 1/2 cup (1 stick) unsalted butter, at room temperature
  • 2 large eggs, at room temperature
  • 1 cup granulated sugar
  • 2 tsp. vanilla
  • 2/3 cup  milk

Directions:

Preheat oven to 350 and line 12-cup muffin tin with liners.

Cream the sugar and butter together in the bowl of an electric mixer until color has lightened.

Add egg, one at a time, beating well to combine. Add vanilla; mix until just combined

In a separate, medium-sized bowl, sift together all the dry ingredients (flours through cinnamon).

Add flour mix, alternating with milk, beginning and ending with the flour.

Use a 1/4 cup ice cream scoop to fill the tins 3/4 of the way full; any more and these babies will overflow.

Bake for 18-20 minutes, remove from oven, and let them cook for about 10 minutes before removing from pan.

Now, Martha's version calls for these gorgeous looking swirls of seven-minute frosting, but my hunch was that all that meringue-like egg would get crunchy fast. Please, by all means use that frosting if you want; I had to take into account shelf life of a couple of days and you may be serving these for a crowd, immediately. I just used my own standard buttercream recipe, which includes one stick of unsalted butter, more confectioner's sugar than you think you need (about 6-8 ounces, sifted), 2 tsp. or so vanilla extract, and a few tablespoons of milk to keep the consistency fluffy and smooth. The cinnamon sugar dusting on top is essential to achieve that full-fledged snickerdoodle effect: just combine a small about of both in a small bow and use your judgment about how sugary or cinnamony you like it. We tend to err on the side of cinnamon in this house.

Bagels, Part Deux

carrie

So, quite some time ago, I stopped uploading photos into my laptop. My web site got away from me. I'm always amazed by people who make dinner and then instantly blog it or put a photo up and/or put the recipe and/or link to it. Honestly, I'm trying to clean up dinner and get kids in bed and get laundry in or out and generally trying to maintain my sanity. And then do more work that's likely to be due tomorrow. Although I would love to do all of that, I can't seem to. Now, all of that aside—here we are. School's out (for the summer, maybe forever), and I'm trying to get caught up on my overdue posting. You may, in the coming days, find something so untimely as a St. Patty's Day post about green mac and cheese. You may even, gulp, see a photo of a chocolate cookie in the shape of a heart, half-dipped in chocolate and sprinkled with festive sprinkles. Sorry, people.

everything bagels
everything bagels
everything close up
everything close up

In the meantime, here are some glamor shots of the everything bagels I made in early April.

Crazy Zucchini Harvest: Make Fritters!

carrie

IMG_2892
IMG_2892

My amazing friend C, who just had a baby, tends to her community garden plot in between feedings. She was there over the weekend and there was only one flower that was bearing fruit. Today she returned and was greeted with a small army of baseball-bat sized zucchini. Ok, I exaggerate, but only slightly. She thought she'd planted seeds for half yellow squash (her preference) and half zucchini, but alas! alack! no such luck.

We lined them up and weighed them. The biggest clocked in at 4 pounds, 11 ounces.

In case you're like us--curious, hungry, and inventive, but man-that's-a-lotta-zucchini--here are some links to some good zucchini recipes, and suggestions for what to do.

Zucchini bread: Tried and true. Freeze a bunch. You'll be glad you did. My favorite recipe comes from  King Arthur Flour Whole Grain Baking, and involves white whole wheat flour, cinnamon, and is really moist.

Grilled, roasted, sauteed. Salt and pepper. Olive oil. You don't need much else.

Turn them into ribbons and saute with herbs.

Eat them raw with salt and pepper.

Slice them thinly and top them on homemade flatbread pizzas.

Zucchini pie. Here's one.

Zucchini Oven Chips, from Cooking Light. I've always wanted to make these. Perhaps this is the year; some are large enough that they'll be more like discs than chips but who cares?

Last summer, with all the swiss chard that kept giving itself up for our enjoyment, I made a lot of reverse frittatas, inspired by a Mark Bittman column. I've been calling it the less egg, more veg frittata. The photo you see here also includes local purple potatoes from last summer.

And finally, my favorite delicious thing to do with zucchini is to make Nigella Lawson's zucchini, mint, and feta fritters. Here's the recipe, from NPR's site. Here's the basic text of it. The recipe is from her book Forever Summer. It yields about two dozen, and it's great as is with salad for dinner, or makes a good summer lunch, too.

* 4 zucchini (approx. 1 pounds)

* 5-6 scallions, finely chopped

* 9 ounces feta cheese

* small bunch fresh parsley, chopped

* small bunch fresh mint, chopped, plus extra to sprinkle over at the end

* 1 tablespoon dried mint

* 1 teaspoon paprika

* scant 1 cup all-purpose flour

* salt and pepper

* 3 eggs, beaten

* olive oil for frying

* 3-4 limes

Coarsely grate the zucchini with either the grating blade in the food processor or by hand. Spread the little shards out on a tea towel and leave for about 20 minutes to get rid of any excess wetness.

Put the chopped scallions in a bowl and crumble in the feta. Stir in the chopped parsley and mint, along with the dried mint and paprika. Add the flour and season well with salt and pepper. Gradually add the beaten egg and mix thoroughly before stirring in the drained, grated zucchini. Don't be alarmed by the unflowing straggly lumpiness of this batter; it's meant to be this way.

Heat a few tablespoons of oil in a large frying pan and drop heaped dessertspoons of the moisture into the hot oil, flattening the little cakes down the back of the spoon as you go. Cook these little patties for about 2 minutes each side until golden, and then transfer to a couple of waiting plates.

Chop up the limes and tumble them about the edges of the plates. Sprinkle over a little more chopped mint and eat them just as they are, spritzed with lime juice as you go.

And finally, here's the zucchini haul. Note the Croc, carefully positioned, to provide perspective.

IMG_5298
IMG_5298

Homemade Granola Bars

carrie

I’ve been busy cooking and baking fun things this semester and regret that I have not put more of those items up on our blog. However, I’ve been too busy reading papers. One thing I’ve been making a lot of lately is homemade granola bars. John got me a dehydrator for Christmas and I’ve used it for some things; dried fruits have been on the brain. This recipe is one I adapted from King Arthur Flour online. Granola bars are one of those mass-produced items that are really easy to make on your own, and immensely more satisfying because you can customize them to your liking. For example, the original recipe called for or at least suggested coconut, which I abhor (texture issues). You can do almost whatever you like. I’ve done dried cranberries, cherries, blueberries (hard to find but delicious), mini chocolate chips, almonds, walnuts, white sesame seeds, sunflower seeds, and the like. What’s even better is that everyone, including the boys, likes them. I must say a few words about the ingredients. Many granola bar recipes I tried before changing this one and adapting it to my liking contained melted butter whisked together with brown sugar as the sweetening/binding/wet ingredients. I tried it, and it was way too sweet for me. I could not really taste the other ingredients. On a lark, I’d gotten some blue agave nectar when I was at Trader Joe’s (it’s a vegan choice, and although I’m not, I thought I’d mention it for those who are). It has a longer shelf life than honey and does not crystallize like honey does, although you can use it much in the same way. It also has a low glycemic index, so it does not give you a sugar spike like regular granulated sugar would. But you can feel free to use some combination of honey and the other two sweeteners, or even try melted butter (I would suggest about 1/4 cup, or half a stick, for starters). I’ve also used golden syrup, maple syrup (good for fall granola bars, I think), and light corn syrup in a pinch. However, if you can find the blue agave, and the brown rice syrup (I can imagine the latter being delicious on vanilla ice cream) in the natural/organic sections of your supermarket or elsewhere you may indeed find that you have a new fun thing to play with in the kitchen. Blue agave is good on pancakes, french toast, and agave is good in tea and iced tea and more. Ok, on with the recipe!

It's time for your close-up, homemade granola bars

It's time for your close-up, homemade granola bars

Homemade Granola Bars

Yield: About 16-20, depending on how big you cut them

1 2/3 cup quick rolled oats

1/3 cup whole wheat flour or white whole wheat flour

1/3 cup brown rice syrup

1/4 to 1/3 cup organic raw agave nectar (Trader Joe’s sells one for a mere $2.99!)

1/2 tsp. salt (Note: If you used salted nuts, omit salt here)

1/4 tsp. ground cinnamon, optional (I also tried it with ground ginger or nutmeg; equally good)

2 to 3 cups mix of dried fruits and nuts (I commonly used cranberries, blueberries, almonds, walnuts and sunflower seeds, but think of raisins, prunes, apricots, coconut, pecans–the sky’s the limit.)

Directions

  1. Preheat the oven to 325. Line a 9 x 13 inch pan with parchment; grease or spray the parchment for easy cutting and removal.
  2. Stir together all the dry ingredients, including the fruit and nuts.
  3. Add the wet, syrupy sweet ingredients and stir carefully to coat everything; use a wide plastic spatula.
  4. Spread it out in the pan, patting it down gently so that it is evenly distributed. Bake for about 25-30 minutes, possibly longer depending on your oven, until it is golden brown around the edges.
  5. Remove it from the oven and loosen the edges. Cool for at least five minutes but not too much longer.
  6. Cut the bars while they’re still warm, in the pan, then remove, carefully, using the overhanging parchment, and cool completely on a wire rack.

Note: These will keep covered, in an airtight container, for up to a week. However, they won’t last that long, trust me. If you can’t get them cut evenly, don’t fret. Broken up granola is good with yogurt, ice cream, fruit, or by itself in your greedy hands.